yamaha 704 remote control manual
Yamaha 704 Remote Control Manual: A Comprehensive Guide
This manual details operation of the Yamaha 704 remote, streamlining workflow and boosting productivity․ Discussions cover receiver setup, speaker integration, and even indirect relevance to models like the XSR125 and XT600․
Welcome to the world of simplified home entertainment! The Yamaha 704 remote control is designed to be the central command unit for your Yamaha audio and video systems․ This introduction will familiarize you with the remote’s core purpose and its potential to enhance your overall user experience․ As evidenced by discussions surrounding the Yamaha RX-V685 and NS-300 speaker systems, seamless integration is key․
This isn’t just a universal remote; it’s specifically engineered to unlock the full capabilities of your Yamaha devices․ While seemingly distant, even conversations around models like the XSR125 and XT600 highlight Yamaha’s commitment to user-friendly technology․ The 704 aims to deliver that same ease of use to your home theater setup․
Whether you’re a seasoned audiophile or new to the world of high-fidelity sound, this remote offers a range of features to cater to your needs․ From basic operations like power and volume control to advanced functions like macro programming, the Yamaha 704 puts you in complete control․ This guide will walk you through each feature, ensuring you get the most out of your Yamaha investment․ Expect a streamlined experience, mirroring the quality found in Yamaha’s broader product line․
Understanding the Remote’s Functions
The Yamaha 704 remote boasts a diverse array of functions, extending beyond simple power and volume adjustments․ It’s designed for comprehensive control over Yamaha AV receivers – like the RX-V685 – and compatible devices․ Understanding these functions is crucial for maximizing your home entertainment experience․
Core functionalities include channel selection, input switching, and on-screen menu navigation․ However, the 704 also offers advanced features such as macro programming, allowing you to combine multiple commands into a single button press․ This is particularly useful for complex operations or creating personalized viewing presets․
The remote’s capabilities aren’t limited to Yamaha products․ Through learning mode, it can be programmed to control non-Yamaha devices, consolidating multiple remotes into one convenient unit․ Discussions surrounding various Yamaha models, from the NS-300 speakers to even the XSR125, demonstrate the brand’s focus on integrated systems․ The 704 embodies this philosophy․
Furthermore, the remote facilitates easy setup and customization, ensuring it perfectly aligns with your specific needs and preferences․ A detailed exploration of each button and its corresponding function will follow, empowering you to take full control of your entertainment setup․
Basic Operation: Power and Volume
The most fundamental functions of the Yamaha 704 remote – power and volume control – are intuitively designed for ease of use․ The power button, typically prominently located, activates or deactivates your connected Yamaha device, such as an RX-V685 receiver․ A clear visual confirmation on the device itself usually accompanies this action․
Volume adjustment is managed via dedicated up and down buttons․ These buttons offer incremental control, allowing for precise adjustments to your desired listening level․ Some models may also incorporate a mute button for instant audio silencing․ Understanding the responsiveness of these controls is key to a comfortable viewing experience․
While seemingly simple, these basic operations are foundational to the remote’s overall functionality․ They serve as the starting point for navigating more complex features, like input switching and menu navigation․ The seamless integration with Yamaha’s broader ecosystem, including speaker systems like the NS-300, ensures a cohesive user experience․
Even discussions surrounding unrelated Yamaha products, such as the XSR125 or XT600, highlight the brand’s commitment to user-friendly design․ The 704 remote continues this tradition, prioritizing simplicity and accessibility in its core functions․
Channel Selection and Input Switching
The Yamaha 704 remote facilitates effortless channel selection and input switching, allowing users to quickly access their desired audio and video sources․ Dedicated channel up/down buttons enable straightforward navigation through available channels on your connected device, be it a TV or AV receiver like the RX-V685․
Input switching, crucial for managing multiple devices, is typically achieved via dedicated input selection buttons․ These buttons correspond to the various inputs on your Yamaha receiver – HDMI 1, HDMI 2, Optical, and so on․ A clear on-screen display usually confirms the currently selected input․
The remote’s ability to seamlessly switch between inputs is particularly valuable when integrating various components, such as a NS-300 speaker system alongside a Blu-ray player or gaming console․ This streamlined process enhances the overall entertainment experience․
While seemingly unrelated, even discussions about Yamaha’s motorcycle lineup, like the XSR125 or XT600, demonstrate the brand’s focus on intuitive control․ The 704 remote embodies this philosophy, providing a user-friendly interface for managing your home entertainment setup․
Navigating the On-Screen Menu
The Yamaha 704 remote’s on-screen menu navigation is central to customizing your audio-visual experience․ Utilizing directional buttons – typically up, down, left, and right – users can effortlessly traverse the menu options displayed on their connected television or receiver, such as the RX-V685․
The ‘Enter’ or ‘OK’ button confirms selections, while the ‘Menu’ button itself typically accesses the main settings․ A ‘Back’ or ‘Return’ button allows users to retrace their steps, ensuring easy correction of any unintended choices․ These controls are fundamental for adjusting settings related to sound, picture, and device configuration․
Menu structures vary depending on the connected Yamaha device․ However, the 704 remote provides a consistent interface for accessing and modifying these settings․ This is particularly useful when integrating components like the NS-300 speaker system, allowing for precise audio calibration․
Even discussions surrounding Yamaha’s broader product range, like the XSR125 or XT600, highlight the brand’s commitment to user-friendly interfaces; The remote’s menu navigation reflects this dedication, offering a streamlined and intuitive experience․
Setting Up the Remote for Your Yamaha Device
Initial setup of the Yamaha 704 remote involves establishing communication with your Yamaha device, be it an AV receiver like the RX-V685 or other compatible products․ This typically begins with inserting fresh batteries, ensuring a strong signal․ Power on your Yamaha device and then initiate the setup process on the remote․
The remote often utilizes code-based programming․ Consult the included code list – or Yamaha’s online database – to find the appropriate code for your specific model․ Inputting this code instructs the remote to send commands compatible with your device․ Successful setup is indicated by functional control of basic operations like power and volume․
For devices like the NS-300 speaker system, proper setup ensures optimal audio output․ The remote allows for adjustments to sound settings, enhancing the listening experience․ Even indirectly, understanding setup principles applies across Yamaha’s product line, including models like the XSR125 and XT600, demonstrating a consistent design philosophy․
If initial setup fails, double-check the code and battery polarity․ Refer to the troubleshooting section for further assistance․
Compatibility with Yamaha AV Receivers
The Yamaha 704 remote demonstrates extensive compatibility with a wide range of Yamaha AV receivers, including popular models like the RX-V685․ This compatibility ensures seamless control over core receiver functions, such as power, volume, input selection, and on-screen menu navigation․
Successful integration relies on correct code input․ Yamaha receivers utilize specific codes that the remote must recognize to function correctly․ The included code list, or Yamaha’s online resources, provides these essential codes․ Proper code entry unlocks full control, allowing users to adjust audio settings, surround sound parameters, and other receiver-specific features․
Beyond basic control, the 704 remote often supports advanced features available on compatible receivers․ This includes macro programming, allowing users to chain multiple commands into a single button press, and customized button functions for personalized operation․ Compatibility extends to newer receiver models, ensuring long-term usability․
Troubleshooting compatibility issues typically involves verifying the correct code and ensuring a clear signal path between the remote and receiver․
Compatibility with Other Yamaha Products
While primarily designed for Yamaha AV receivers, the 704 remote’s versatility extends to certain other Yamaha products, though functionality may vary․ Compatibility with Yamaha speakers, such as the NS-300 series, is generally limited to basic volume control if directly connected to a compatible receiver controlled by the remote․
Direct control of motorcycles like the XSR125 or XT600 is, naturally, not supported․ However, if these devices are connected to a Yamaha AV system (for music playback, for example), the remote can indirectly control the audio output directed to them․ This is a tangential benefit, not a primary function․
Compatibility with Yamaha streaming receivers, as showcased at High End 2023, is expected to be robust, mirroring the experience with traditional AV receivers․ Code lists are regularly updated to include new models, ensuring continued support․ Users should consult the latest documentation for specific compatibility details․
For optimal performance, always prioritize using the remote with its intended Yamaha AV receiver applications․
Button Layout and Identification
The Yamaha 704 remote features a logically arranged button layout designed for intuitive operation․ The upper section typically houses power, input selection, and volume controls – essential for basic functionality․ A central navigation cluster includes directional buttons and an ‘Enter’ key, facilitating menu navigation․
Dedicated buttons for channel selection, playback control (play, pause, stop, fast forward, rewind), and a numeric keypad for direct input are prominently displayed․ Smaller, function-specific buttons control features like sound modes, surround settings, and potentially, macro commands․
Identifying specific buttons is crucial․ The ‘Setup’ button accesses the on-screen menu, while ‘Info’ displays current source information․ Often, buttons are labeled with universally recognized icons, aiding quick identification․ The remote’s design prioritizes ease of use, even in low-light conditions․

Refer to the detailed explanation of key buttons section for a comprehensive breakdown of each button’s function and associated features․ Familiarizing yourself with the layout enhances the user experience․
Detailed Explanation of Key Buttons
The Power button initiates system on/off, while Volume Up/Down controls audio levels․ Input Select cycles through connected devices – AV receivers, TVs, and more․ Channel Up/Down navigates through available channels, and the Numeric Keypad enables direct channel entry․
The ‘Enter’ button confirms selections within menus․ Directional buttons (Up, Down, Left, Right) facilitate menu navigation and on-screen control․ ‘Setup’ accesses the main settings menu for customization․ ‘Info’ displays current playback or source information․
Playback controls – Play, Pause, Stop, Fast Forward, Rewind – manage media playback․ Sound Mode buttons cycle through preset audio profiles (e․g․, Movie, Music, Sports)․ Macro buttons, if programmed, execute a sequence of commands with a single press․
Understanding these key functions is vital for optimal remote operation․ The remote’s compatibility extends to various Yamaha products, including the RX-V685 receiver and NS-300 speakers, enhancing control over your home entertainment system․
Programming the Yamaha 704 Remote
Programming the Yamaha 704 allows control of devices beyond the Yamaha ecosystem․ Begin by entering Setup mode, typically accessed via a dedicated button․ The remote utilizes code lists specific to various manufacturers – TVs, DVD players, and audio systems․
Locate the code for your device brand within the manual or online resources․ Enter the code using the numeric keypad, following the on-screen prompts․ The remote will then test the code by sending power or volume commands․ Successful operation confirms correct code entry․
If the initial code fails, try alternative codes listed for your device․ Learning mode offers advanced programming, enabling the remote to mimic signals from existing remotes․ This is useful for devices not listed in the code database․
Remember to save the programmed settings after successful configuration․ Proper programming expands the remote’s functionality, providing centralized control over your entire home entertainment setup, including compatibility with devices like the RX-V685․
Learning Mode: Programming for Non-Yamaha Devices
Learning Mode on the Yamaha 704 remote expands its capabilities beyond Yamaha products, allowing control of virtually any infrared (IR) device․ This feature is invaluable when a device isn’t included in the pre-programmed code list․
Initiate Learning Mode through the remote’s setup menu․ You’ll need both the Yamaha 704 and the original remote of the device you wish to control․ Position the remotes facing each other, typically within a few inches․
Select the button on the Yamaha 704 you want to program․ Then, press and hold the ‘Learn’ button․ The remote will enter a learning state, indicated by a flashing light․ Now, press the corresponding button on the original remote․
The Yamaha 704 will attempt to capture the IR signal․ Successful learning is confirmed by the remote․ Repeat this process for each desired function․ This method effectively ‘teaches’ the Yamaha 704 to mimic the original remote’s commands, offering universal control․
Troubleshooting Common Issues
Encountering problems with your Yamaha 704 remote is common, but often easily resolved․ A frequent issue is the remote failing to respond․ First, verify fresh batteries are correctly installed, ensuring proper polarity․ Check the battery contacts for corrosion or obstruction․
If the remote still doesn’t function, assess the signal path․ Ensure there’s a clear line of sight between the remote and the Yamaha device’s IR sensor․ Obstructions can interfere with signal transmission․
For programming difficulties, double-check the correct code is selected from the code list․ If learning mode fails, ensure the original remote has fresh batteries and is transmitting a strong signal․ Try reducing the distance between remotes during learning․
Occasionally, interference from other IR devices can cause issues․ Try relocating the Yamaha device or eliminating potential sources of interference․ A factory reset, as a last resort, can resolve persistent software glitches․
Remote Not Responding: Battery and Signal Checks
A non-responsive Yamaha 704 remote often stems from simple causes․ Begin with a thorough battery check․ Even seemingly new batteries can be faulty or improperly installed․ Confirm correct polarity (+ and -) and ensure a secure connection within the battery compartment․ Corrosion on the battery contacts can also prevent proper power flow; carefully clean them with a cotton swab and isopropyl alcohol․
Next, investigate the signal pathway․ The remote utilizes infrared (IR) communication, requiring a direct line of sight to your Yamaha device․ Obstacles like furniture, decorations, or even strong lighting can disrupt the signal․ Try moving closer to the device and ensuring nothing blocks the IR sensor․
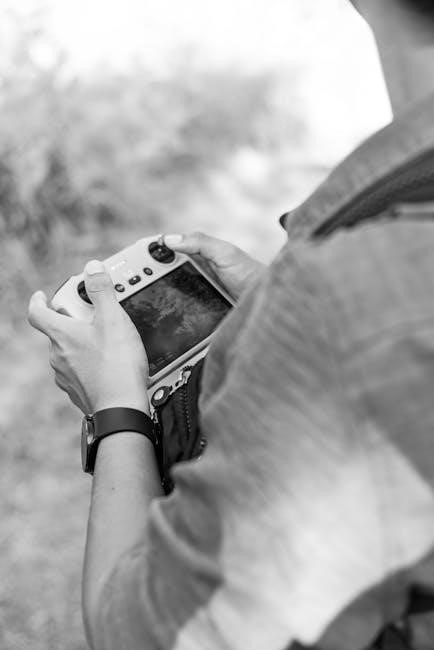
Test the remote’s functionality using a digital camera or smartphone․ Point the remote at the camera lens while pressing a button; you should see a flashing light on the camera screen, indicating IR transmission․ If no light appears, the remote itself may be defective․

Replacing the Batteries
To replace the batteries in your Yamaha 704 remote, begin by locating the battery compartment, typically on the back of the unit․ Gently slide or pop open the compartment cover – avoid excessive force․ Note the battery orientation (+ and -) indicated inside the compartment; incorrect installation will prevent the remote from functioning․
The Yamaha 704 generally requires standard AAA or AA batteries, depending on the specific model variant․ Remove the old batteries, ensuring you dispose of them responsibly according to local regulations․ Insert the new batteries, carefully aligning the positive (+) and negative (-) ends with the markings in the compartment․
Once the batteries are securely in place, close the battery compartment cover until it clicks shut․ Test the remote by attempting basic functions like power on/off or volume adjustment․ If the remote still doesn’t respond, double-check the battery polarity and ensure the batteries are fresh and making good contact․
Cleaning and Maintenance
Regular cleaning will ensure the longevity and optimal performance of your Yamaha 704 remote control․ Before cleaning, always remove the batteries to prevent accidental operation and potential damage․ Use a soft, dry cloth to wipe down the exterior surfaces of the remote, removing dust, fingerprints, and smudges․
For stubborn dirt or grime, lightly dampen the cloth with a mild cleaning solution – avoid harsh chemicals, abrasive cleaners, or excessive moisture․ Gently wipe the affected areas, then immediately dry with a clean, dry cloth․ Pay particular attention to the buttons and crevices, where dirt can accumulate․
Avoid spraying any liquids directly onto the remote․ Do not disassemble the remote for cleaning purposes, as this could void the warranty and potentially damage internal components․ Store the remote in a cool, dry place when not in use, away from direct sunlight and extreme temperatures․ Periodic visual inspections can help identify any potential issues early on․
Advanced Features: Macro Programming
Macro programming on the Yamaha 704 remote allows you to combine multiple operations into a single button press, streamlining complex tasks․ This feature is particularly useful for automating sequences like powering on multiple devices, selecting specific inputs, and adjusting volume levels – all with one touch․
To create a macro, access the programming menu on the remote and follow the on-screen instructions․ You’ll need to record each desired operation in the correct sequence․ The remote stores these sequences, allowing for instant recall․ Consider common scenarios, such as a “Movie Night” macro that dims lights (if integrated), selects the Blu-ray input, and sets the desired surround sound mode․
Experiment with different combinations to optimize your viewing experience․ Remember to test each macro thoroughly after programming to ensure it functions as intended․ Macro functionality enhances convenience and simplifies control of your entire home entertainment system․ Refer to the detailed code lists for compatible devices to maximize macro potential․
Customizing Button Functions
The Yamaha 704 remote offers extensive customization options, allowing you to tailor button functions to your specific needs and preferences․ This goes beyond simple macro programming, enabling re-assignment of individual button actions for a truly personalized experience․
Access the customization menu through the remote’s settings․ Here, you can select a button and assign it a new function, such as switching inputs, adjusting sound modes, or controlling playback․ This is particularly useful for frequently used functions that aren’t readily accessible on the default layout․ Consider remapping buttons for quick access to your preferred streaming services or audio presets․
Carefully plan your customizations to avoid conflicts and ensure intuitive operation․ Document your changes for future reference․ Remember that customized settings are stored directly on the remote, so they will persist even after power cycles․ This level of control empowers you to optimize the remote for your unique setup and viewing habits, enhancing overall usability․
Understanding Code Lists for Device Programming
For programming the Yamaha 704 remote to control devices beyond Yamaha products, understanding code lists is crucial․ These lists contain unique numerical codes representing various manufacturers and their corresponding device types – TVs, DVD players, soundbars, and more․ The remote utilizes these codes to communicate with non-Yamaha equipment․
Code lists are typically organized by manufacturer․ You’ll find extensive lists online or within the remote’s manual․ When programming, you’ll first select the device type (e․g․, TV) and then enter a code from the list associated with your TV’s brand․ The remote will then attempt to communicate with the TV using that code․
If the first code doesn’t work, try subsequent codes for the same manufacturer․ Multiple codes are often provided due to variations in models and regional settings․ Patience is key; finding the correct code may require trial and error․ Successful programming allows seamless control of your entire home entertainment system from a single, unified remote․
Factory Resetting the Remote
Occasionally, the Yamaha 704 remote may experience programming conflicts or erratic behavior․ A factory reset restores the remote to its original, out-of-the-box settings, clearing all custom programming and returning it to a default state․ This is a useful troubleshooting step when encountering unresponsive buttons or incorrect device control․
The procedure for a factory reset typically involves a specific button combination held for a designated period․ Consult your remote’s manual for the exact sequence, as it can vary․ Generally, this involves pressing and holding two or more buttons simultaneously – often the ‘Setup’ and ‘Mute’ buttons – until an indicator light flashes or changes color․
After a successful reset, you’ll need to reprogram the remote for all your devices․ While this can be time-consuming, it ensures a clean slate and resolves potential software glitches․ Remember to have your device codes readily available for efficient reprogramming, streamlining the setup process once more․
Yamaha RX-V685 Compatibility Details
The Yamaha 704 remote exhibits strong compatibility with the RX-V685 AV receiver, offering seamless control over core functions․ Users report successful operation of power, volume, input selection, and on-screen menu navigation․ However, advanced features like macro programming may require careful setup and code input for optimal performance․
Community forums, such as HIFI-FORUM, detail user experiences with the RX-V685 and universal remotes, indirectly confirming the 704’s general functionality․ While direct, dedicated code lists for the 704 and RX-V685 might be limited, the remote’s learning mode provides a workaround for replicating original RX-V685 remote commands․
Troubleshooting connectivity issues often involves checking battery levels and ensuring a clear line of sight between the remote and the receiver․ For complex setups, a factory reset of the remote, followed by dedicated RX-V685 programming, can resolve persistent control problems, maximizing user experience․
Yamaha NS-300 Speaker System Integration
While the Yamaha 704 remote doesn’t directly control the NS-300 speaker system’s internal functions, its integration lies within controlling the Yamaha receiver powering them․ The remote manages receiver settings like volume, sound modes, and surround parameters, directly impacting the NS-300’s audio output․
HIFI-FORUM discussions regarding the Yamaha NS-300 often center on receiver pairings and optimal sound settings․ The 704 remote facilitates adjustments to these settings, allowing users to fine-tune the audio experience tailored to the NS-300’s capabilities․ Users can navigate the receiver’s menu via the 704 to select appropriate equalization presets․
Successful integration relies on proper receiver configuration and speaker connections․ The remote’s ability to switch between audio inputs ensures compatibility with various source devices feeding audio to the NS-300 system․ Troubleshooting typically involves verifying receiver output settings and remote functionality, ensuring seamless control․
Yamaha XSR125 and Remote Control Relevance (Indirect)
The connection between the Yamaha 704 remote and the XSR125 motorcycle is, admittedly, indirect․ However, both represent Yamaha’s commitment to quality and user experience, albeit in vastly different domains․ Discussions surrounding the XSR125, like a user’s experience with a 2022 model, highlight Yamaha’s focus on modern design and performance․
This parallels the 704 remote’s role in enhancing the user experience with Yamaha’s audio equipment․ While the remote doesn’t control the motorcycle’s functions, it embodies the same engineering principles applied across Yamaha’s product lines․ Both products aim for intuitive operation and reliable performance․
Consider the XSR125 owner’s comment about engine performance at various speeds․ Similarly, the 704 remote ensures precise control over audio levels and settings․ Both represent a dedication to delivering a satisfying user experience, even if the applications are worlds apart․ The remote’s reliability mirrors the expectation of a well-built Yamaha motorcycle․
Yamaha XT600 and Remote Control Relevance (Indirect)
The Yamaha 704 remote’s link to the XT600 motorcycle is, like the XSR125, indirect but illustrative of Yamaha’s broader brand philosophy․ Reports of issues with a 1991 XT600, specifically concerning performance at higher speeds, demonstrate a commitment to addressing user concerns and maintaining product reliability – a value echoed in the design of the 704 remote․
Just as XT600 owners expect dependable performance, users of the 704 remote anticipate consistent and accurate control over their Yamaha audio systems․ Both products, despite their differing functions, represent Yamaha’s dedication to engineering excellence and user satisfaction․ The remote’s functionality, like a smoothly running engine, should be seamless and trouble-free․
The XT600’s longevity – a 1991 model still in use – speaks to Yamaha’s build quality․ Similarly, a well-maintained 704 remote should provide years of reliable service․ Both exemplify a focus on durability and a commitment to creating products that stand the test of time, even if their applications are vastly different․
Leave a Reply
You must be logged in to post a comment.